The temperatures are cooling, the leaves are falling, and pumpkins are everywhere! 🍂🎃
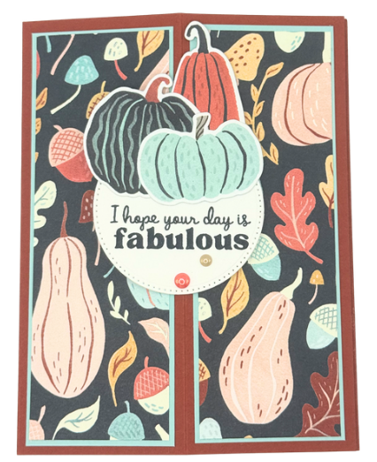
I’ve been having a blast playing with the Painted Pumpkin Bundle!
Not only do the dies create some fabulous pieces (and even cut out pumpkins right from the Designer Series Paper!), but the color palette is SO much fun!
And you know what makes it even better? One of my all-time favorite colors is included… Pool Party!
I just love how these colors come together, especially on this fun fold card!
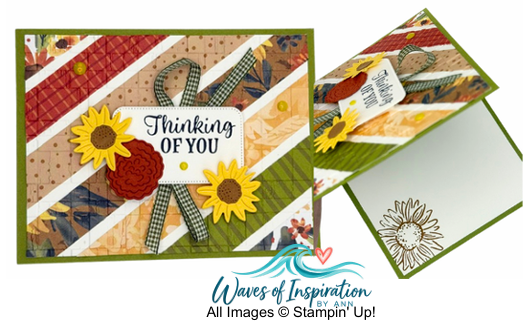
I used the same embossing folder twice to create this look. First, I embossed a white background, then embossed another piece of white cardstock and cut out a smaller section for the focal point.
Next came the fun part! I used Blending Brushes to add color to the embossed sunflowers. Then I lightly applied Craft White Ink to the raised areas, sprinkled on White Embossing Powder, and heat embossed to highlight all those beautiful details!
A few Dimensionals lift the focal piece and give the card even more depth.
I stamped the sentiment on Coastal Cabana cardstock, heat embossed it in white, and fussy cut around it.
And heads up! This beautiful embossing folder is on the Last Chance List, so don’t wait too long if it’s on your wish list! 👀
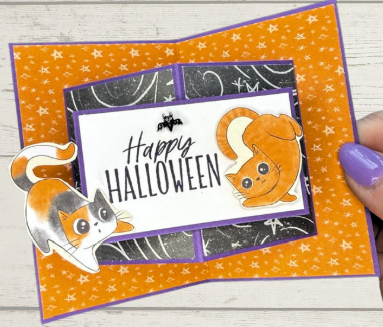
Frightfully Fun Designer Series paper is SO cute with the playful kitties, I just had to find a way to make the card pop! This fold is a great way to show off those papers that you love. Once I made the first one, I couldn’t stop. AND, the card stands up for display beautifully!
Follow along with the photos below, and you’ll have this fun fold figured out in no time!
Start with 5 1/2″ x 4 1/4″ piece of Gorgeous Grape. I love adding purple to my Halloween cards. I adhered the 5 3/8″ x 4 1/8″ orange star DSP to the Gorgeous Grape.
Then, score at 2 3/4″, flip over and score again because you have 2 layers to get through.
Next, I cut another Gorgeous Grape piece 5″x 2 3/4″ and score it at 1/2″, 2 1/2″, & 4 1/2″. I added a piece of 2 5/8″ x 1 7/8″ stars & swirls DSP to each of the panels.
Now for the fun part! I added liquid glue to each of the 1/2″ flaps adhered to the base.
Next, you have 2 pieces of Gorgeous Grape cut at 2 1/2″ x 1″ and scored at 1 1/4″. I then gluedk the one side to the black DSP. The crease of the fold goes up right up to the center of the black Stars & Swirls DSP.
Now it’s time to attach the cute little focal piece! I chose to fussy cut those two playful cats.
Flip the card over and attach a 4″ x 2½” piece of white cardstock to the back panel for your message. You could also use DSP on one panel and white cardstock on the other.
For my focal pieces, I used Gorgeous Grape cardstock measuring 3″ x 1¾” and white cardstock measuring 2⅞” x 1⅝”.
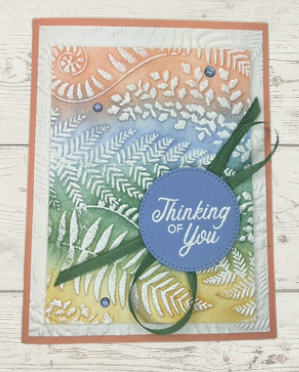
This card was made using four of this year’s new In Colors: Crisp Cantaloupe, Hydrangea Hue, Peaceful Pine, and Golden Glow.
First, with a blending brush, I layered each color to the depth of color that I wanted.
Then came the fun part! I embossed the cardstock, which gave all those blended colors some beautiful texture and dimension.
When I want the embossed design to really stand out, I like to use the Craft White ink pad with white embossing powder. The white catches just the raised areas and really brings the pattern to life.
I wanted more of that beautiful embossed background to show, so I trimmed the front panel down just a little. And I couldn’t let those scraps go to waste! I used one of the trimmings inside the card for a simple finishing touch.
It’s an easy way to get a completely different look from an embossing folder you may already have in your craft room.
Give your projects a luxurious glow-up using the Stampin’ Hot Foil System & Craft Class! This system uses heat, pressure, special dies, and foil rolls to transfer metallic designs right into your cardstock or other material, adding elegance and brilliant shine. Use with a Stampin’ Cut & Emboss Machine.